Friday 1 November 2013

Happy Halloween!

Happy Halloween everyone!

So being Aussie, we don't really celebrate Halloween BUT I volunteered to supervise the Halloween Disco at my school so any excuse to dress up AND paint my nails!


This is me in my mummy costume....


... and these are my nails to match! 


I think they look super cute. :) 


Happy Halloween!! 


Monday 14 October 2013

Galaxy Nails!

So on Saturday night I went to the movies with my friend Haydee to see Gravity. You know? The movie with Sandra Bullock floating around in space. Well we went to see that! And it was awesome! SO AWESOME that I was inspired to finally try my hand at some galaxy nails. I had seen this style on so many other blog I had been meaning to try it, and since I had the inspiration I thought 'What the heck?'....

Now trying to do research on this nail art nearly blew my mind. Every single person has a different way to go about it, some used shimmer polish while others used glitter polish, some layered upon layer upon layer, while other were simple. Ahhhhhhh! *blown mind*

In the end I picked some 'spacey' colours and came up with this...


OK so I used a LOT of colours....this is the order in which I used them.

Purple: 17 - Royal Indigo
Pink: Cate Ruby - Meg
Light Blue: Essence - Absolutely Blue
White: 17 - Mini Skirt
Yellow: Kiko - Shade 279
Sparkle Purple - BC Co - Shade 4
Shimmer Blue: Essence - The Boy Next Door
White (stars): Sally Hansen - White On


I was so complete hung up on technique I realised that the best way to get results is to use your imagination, and you really cant get this wrong (unless you attempt a shooting start and it stuffs up and becomes a starfish shape (see ring finger)).

Hope you like it? 


Sunday 6 October 2013

Sugar Skulls

GUYS!
I know it has been a while... I have been super busy.
Over the course over the last couple of months I have been to London and back AND started a new job. But this weekend I decided to get back in the swing of things.... so here is my sugar skull nail art.

My inspiration for these actually comes from my boyfriend. He and his mate create the most interesting t-shirts designs, and their first ever one was a picture of a sugar skull... so here is my interpretation.


I decided to use some of my bf's favourite colours...

White: Sally Hansen - White On
Black: Sally Hansen - Black Out
Green: Barry M - Watermelon
Red: NYC - Boundless Berry


I know it's not the best I have done, but at least it is better than nothing!! :)

Enjoy!!


PS: Sorry about the dry cuticles! :(


Sunday 8 September 2013

Blue Flowers


I thought I would try my hand at some free hand nail art.
As you may or may not know, it has been a goal of mine to get batter at my free hand work. So I put away the striping tape, sticky tape, stencils, stamps and picked up a paint brush.

I did try and attempt to do roses but I think if they weren't blue they would have come out much better. I still like it either way.


Purple: BC&Co - Shade 6
Dark Blue: Sinful Colors - Endless Blue
Light Blue: Essence - Absolutely blue


To do these 'so called' roses I used Follow That Way's tutorial. She did a MUCH better job than I did. but you what they say... practise makes perfect! 

What do you think?? (And be honest...) 


Sunday 1 September 2013

Purple Dots!


I have never been a huge fan of the colour purple, but yet I have a gazillion bottles of different shades.
I thought I would have a play and see if I could come up with a cool psychedelic pattern.


Base Colour: Rimmel - Marshmallow Heaven 
Dark Purple: BYS - Reign Supreme 
Magenta: BC&Co. - Shade 6
Light Purple: Savvy - Grapetini


I started with a base colour and used a different size dotting tools to dot random colours.

I picked a starting point on each nail and made that the 'base', the dots in that area were more condensed and then moved out from that point. The further a way the dots got, the less and far between I placed them. Sort of giving an ombre effect.

What do you think??


Wednesday 28 August 2013

Pastel and Studs


I got this new ChiChi nail polish and was wondering how I could use it?

So I ended it pairing it with some of my favourite pastel shades...


Grey: ChiChi - Just Chillaxin
Turquoise: Australis - Aqua
Purple: Rimmel - Marshmallow Heaven
Yellow: Face of Australia - Easy Peasy Lemon Squeezy
Pink: ChiChi - Blonde Ambition
Blue: Essence - Absolutely Blue


I painted each finger a different colour and then used masking tape to create a line down the middle and painted the one half with the greyish colour.

I then topped it with a silver square studs from Born Pretty.

What do you think?


Thursday 22 August 2013

Cartoon Nails!


I have seen many cartoon inspired manicures out there so I thought I would have a go at my own. :D

 I think they came out AWESOME!!!!


I started by painting each finger a different colour. Then using a thin paintbrush I painted a thin black line around the edge and using a dotting tool I created the white 'shine' marks.
To top it all off I used Rimmel - Matte Finish.


All the shades I used were from Bc&Co. You can pick these up from KMart for $2. They are pretty amazing. :)
Pink: Shade 9
Orange: Shade 13
Purple: Shade 6
Yellow: Shade 10
Green: Shade 16

White: Sally Hansen - White On
Black: Sally Hansen - Black Out

I super dooper love these! And can't wait to have another go.

What do you think??


Liebster Blog Award!!

I can not believe it! The lovely Anita from NailsBy Anita nominated me for a Liebster Award! 
So what is a Liebster Blog Award... 

...well it is for blogs which has less than 200 followers. Apparently  Liebster is German for “beloved” and a blog nominated for this award is “worth watching”. 


The rules are:

1. Once you have received a nomination make sure you post this badge somewhere on your blog.

2. Each nominator will have a set of questions for you to answer. Usually about information you have not yet talked about on your blog, therefore giving your followers (and new followers) get to know a little bit more about you. 

3. Nominate 10 blogs will less then 200 followers, who you think deserves this award! 

4. Make sure you let them know! 


5. No tag backs. 


My Answers!!

Ok so here are the answers to Anita's questions...

1. How long have you been painting your nails?
Ok, so I have been painting my nails since I was a teenager. I wasn't allowed to paint my nails growing up so when I was allowed I didn't really stop. I used to take bottles of nail polish to my friends house so I could paint them there while we watch a movie or TV. Haha! I have been doing nail art for just over a year. 

2. If you could paint a celebrity's nails, who would they be? 
I would LOVE to paint Zooey Deschanel. Only because she would let me do some crazy nail art design on them. 


3. What is your worst nightmare?
Hrmmmm, falling over and breaking my teeth OR a fish tank breaking and I am surrounded by flapping fish. Eeeek!    ...weird huh?


4. Besides nail art, what else do you enjoy doing? 
I love reading, even though I haven't done enough this year. 


5. Where do you see yourself in 5 years?
In 5 years I will be 31. Hopefully I will be the owner of my own home, a stable job and LOTS more travelling.


NOW I get to pick my 10 Liebster Blog nominees...so here they are!

1. Jemma from London Varnish 
2. Our Painted World
3. Erin from Hand-y Feats and other Treats
4. Polish All the Nails 
5. Chiara from ...my passion for nails
6. Lacqueerisa
7. Simple Nails
8. Bathelen from Bethelen's Nails 
9. Margriet from 365 days of nail art
10. Melody from The Manicured Amateur

My questions:

- Why did you decided to create a blog??

- What is something you LOVE doing (besides nail art)?

- When did you start doing nail art?

- What was your last dream about?

- What is something you CAN NOT live without and why?


There you go! All done!
Thanks again...
B x


Sunday 18 August 2013

Red Flocking


A couple of weeks ago I was sent LOTS of awesome Chi Chi Cosmetic. Today I thought I would have a try at one of the flocking nail polishes.


How pretty is this colour? I LOVE it! I think I am going to have to do a 'Elmo' inspired nail art soon...

What do you think?


Friday 16 August 2013

Peach Triangles

Here is another on of my scarf inspired nail arts.


I got this really pretty scarf from Valley Girl last month and thought it would make really good inspiration for a nail design.
I used the the aztec theme and the colours to come up with my own design.


I started off with a white base and using a thin paintbrush, I painted on the peach triangles and the black stripes. I think they came out pretty good (despite the slightly blurry photos).


Peach: BYS - Pretty as a Peach
White: Sally Hansen - White On 
Black: BC&Co. - Shade 11


What do you think??


Saturday 10 August 2013

Pretty Peach

Peach is one of my favourite colours... and I can not get enough of using it in my nail art. Can you??

 I thought I would pair it up with some grey and silver and make some really cool geometric tips with it.

What do you think?


Peach: BYS - Pretty as a Peach
Grey: Maybelline - Impeccable Greys
Silver: Barry M - Foil


This is probably one of the easiest designs I have ever done and it looks amazing.

Have a play with it, use different colours and shapes. Let me know how you go? OR give me some suggestions on what I can do with it?

Enjoy! xx


Tuesday 6 August 2013

Green Patterns

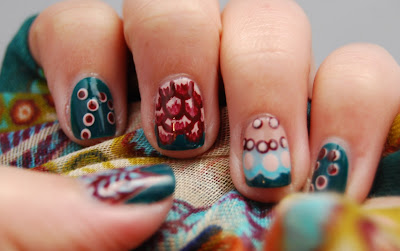
The one thing I love more than nail polish, is scarves. And a few months ago I was given this beautiful scarf from a friend. It is so pretty, with the patterns of emerald green, maroon and beige.


The other day when I was looking for inspiration I came across this scarf and decided to use it for this manicure. 


Green: Barry M - Watermelon
Turquoise: Australis - Aqua
Beige: Avon - Perfectly Flesh 
Maroon: Rimmel - Reality Chic


The design came out really well. 

What do you think? 


Friday 2 August 2013

Silver Half Moons


Here are simple half moons you guys can do at home.


Black: Bc&Co - Shade 11
Silver: Cate Ruby - Metal mix
Silver Glitter


I started of with a few coats of the black and then topped it with Rimmel - Matte Finish.

I then used the silver glitter polish to paint a half moon and topped it with some glitter (just to and a bit more sparkle), which I picked it up from the $2 dollar shop.

Simple! :)


Monday 29 July 2013

London Baby!

Okay folks, in a few hours I will get on a plane and go to my 'home away from home', London!!

I have been lucky enough to live in this great city for nearly 2 years and got to work in some pretty great schools (and some not so great ones), and I also have meet some of the most special people in my life. I am soooo excited!

I thought, to mark the occasion, I would create a British inspired nail art for you all... 


Red: Sinful Colors - Ruby Ruby
White: 17 - Mini Skirt
Blue: Sinful Colors - Endless Blue


I used The Nailasaurus' tutorial to create this... mine came out no where near as good as Sams, but I tried.


Anyway... my bags are nearly packed and I will be gone for 4 weeks (jealous??).  But don't worry, I have spent the last few weeks going a bit nail art crazy to come up with some blog entries for while I'm away. So you can still get your weekly dose of my crazy hobby.

Enjoy!


Thursday 25 July 2013

It's a BOY!

I am a huge sucker for the Royal Family... I mean, I'm pretty much an honorary member as I was there for the Royal Wedding and the Queen's Coronation and even the announcement of Kate's pregnancy (hehe).

But, in all seriousness, for the events of the Royal Family, ESPECIALLY Kate and Will, I find myself swept up in a whirlwind of emotion. And the birth of little Prince George was no different.

I was up a the crack of dawn, watching the telly, filled with so much joy and excitement it was ridiculous. And seeing him yesterday with his proud Mum and Dad was beautiful.


So I thought I would dedicate an entry to the new prince...


Blue: Essence - Absolutely Blue
White: Sally Hansen - White On
Silver: Barry M - Foil
Shimmer: Rhasdala - Sea Spray 


I was originally going to use a baby blue but seeing Kate's dress that day inspired me to go with a cornflour blue instead.

I also used a shimmer on the ring finger but it is not very noticeable in the pictures. So you guys will have to use your imagination.